Navigation Skills Every Hiker Should Know
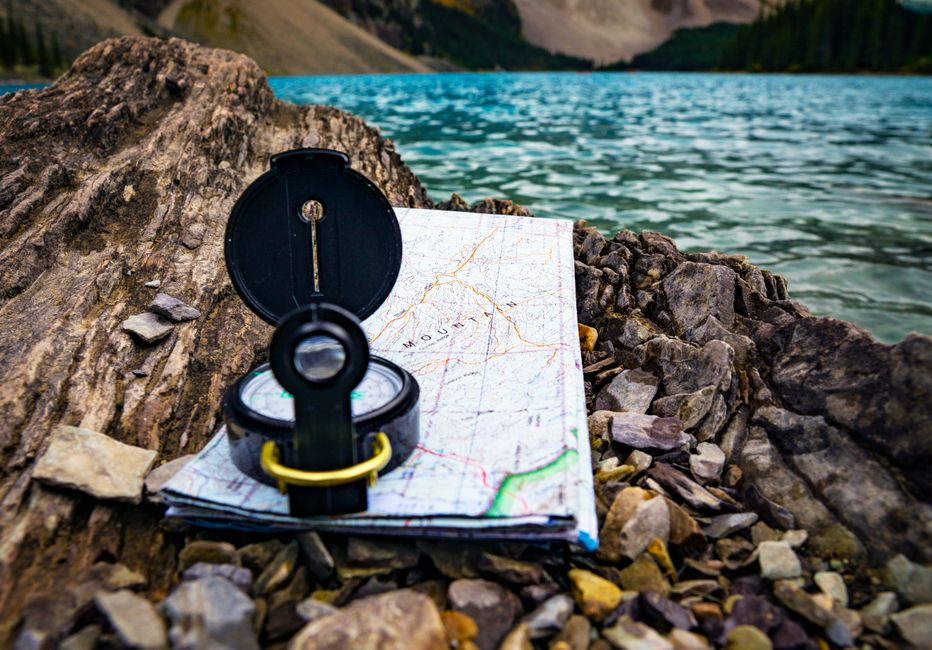
Hiking in the backcountry offers a unique sense of freedom and connection with nature, but it also demands a solid set of navigation skills to ensure a safe and enjoyable experience. Whether you are exploring well-marked trails or venturing into remote wilderness areas, the ability to find your way using a map, compass, and GPS is fundamental. These tools, combined with careful planning and situational awareness, form the backbone of effective route-finding. This article outlines the essential navigation abilities that every hiker should develop, emphasizing practical techniques and decision-making processes that apply in a variety of outdoor settings.
Navigation is not merely about reaching a destination; it involves continuous observation, adaptation, and interpretation of the environment. Trail conditions can change rapidly due to weather, fallen trees, or overgrown paths, making it necessary to rely on multiple methods for staying on course. By understanding how to read a topographic map, use a compass for bearings, and leverage GPS technology appropriately, hikers can confidently navigate through unclear or unmarked terrain. The following sections delve into the core components of navigation, offering a framework for building proficiency over time.
It is important to approach navigation as a skill set that improves with practice and experience. No single tool or technique guarantees success, as factors such as visibility, terrain, and equipment reliability can influence outcomes. Therefore, a balanced approach that integrates traditional and modern methods is often recommended. The information presented here is intended to inform and educate, not to replace hands-on training or professional guidance. Hikers are encouraged to seek formal instruction and practice in controlled environments before relying on these skills in critical situations.
Understanding Topographic Maps
Topographic maps are the foundation of land navigation, providing a detailed representation of the terrain’s shape and features. Unlike simple road maps, topo maps use contour lines to depict elevation changes, allowing hikers to visualize valleys, ridges, and steep slopes. The spacing of contour lines indicates the gradient: closely spaced lines signify steep terrain, while widely spaced lines suggest gentler slopes. Recognizing these patterns helps in assessing the difficulty of a route and identifying potential obstacles or safe passages. Additionally, topographic maps include symbols for trails, water sources, vegetation, and man-made structures, which are invaluable for planning and on-the-go decision-making.
Reading a topographic map involves more than just interpreting contour lines; it requires understanding scale, orientation, and grid systems. The map’s scale, typically expressed as a ratio such as 1:24,000, indicates the relationship between map distance and actual ground distance. This knowledge is crucial for estimating travel time and distances between waypoints. Orientation involves aligning the map with the real world using a compass or natural landmarks, ensuring that the map’s north corresponds to true north. Grid lines, such as those in the Universal Transverse Mercator (UTM) system, provide a coordinate framework for pinpointing locations and plotting routes. Mastering these elements enables hikers to translate the map’s two-dimensional information into a three-dimensional understanding of the landscape.
Practicing map reading in familiar areas before heading into remote backcountry is a prudent way to build confidence. Start by identifying prominent features like peaks, lakes, or trail junctions on the map and then locating them in the field. Over time, this exercise sharpens the ability to correlate map symbols with actual terrain. It is also helpful to study the map’s legend and note any specific details, such as seasonal closures or private property boundaries. By developing a systematic approach to map interpretation, hikers can make informed decisions even when trails become faint or disappear entirely.
Using a Compass for Bearings and Orientation
A compass is a simple yet powerful tool that provides directional reference independent of electronic devices. The most common type for hiking is the baseplate compass, which features a magnetized needle, a rotating bezel, and a baseplate with a direction-of-travel arrow. To use a compass effectively, hikers must first understand magnetic declination—the angle between magnetic north and true north—which varies by location and changes over time. Adjusting for declination ensures that compass bearings align with map coordinates. Many maps indicate the local declination, and some compasses allow for manual adjustment.
Taking a bearing involves pointing the direction-of-travel arrow toward a target, rotating the bezel until the orienting arrow aligns with the magnetic needle, and then reading the degree marking. This bearing can then be transferred to the map by placing the compass on the map with the baseplate edge connecting the current position and the destination, and rotating the bezel until the orienting lines align with the map’s north-south grid lines. The resulting bearing can be followed in the field by keeping the magnetic needle aligned with the orienting arrow and walking in the direction of the travel arrow. This technique is particularly useful for navigating between waypoints or avoiding obstacles.
Compass use also extends to orienting the map itself. By setting the compass to the desired bearing and placing it on the map, hikers can rotate the entire map until the orienting lines match the compass needle. This aligns the map with the ground, making it easier to identify surrounding features and plan the next leg of the journey. Regular practice in varied terrain helps internalize these steps, reducing reliance on step-by-step recall during stressful situations. It is worth noting that compasses can be affected by nearby metal objects or magnetic rocks, so keeping the compass away from such interference is important for accurate readings.
Integrating GPS Technology
GPS devices have become ubiquitous in outdoor recreation, offering precise location data and preloaded maps. A handheld GPS unit or a smartphone with a navigation app can display your current position, track your path, and guide you to waypoints. However, reliance on GPS alone can be risky, as batteries can die, signals can be lost in deep canyons or dense forests, and devices can fail. Therefore, GPS should be viewed as a complement to, not a replacement for, map and compass skills. Understanding how to use a GPS effectively involves knowing its limitations and cross-referencing its output with traditional methods.
To get the most out of a GPS, hikers should learn to input waypoints, create routes, and interpret the device’s map display. Waypoints are specific coordinates that mark important locations, such as trailheads, water sources, or campsites. Routes are sequences of waypoints that form a planned path. Many GPS units also allow you to record tracks, which can be followed back to the starting point if needed. It is essential to carry extra batteries or a power bank, and to have a backup navigation method in case the device becomes unusable. Additionally, familiarizing yourself with the device’s features before heading out can prevent confusion when you need it most.
GPS technology also offers features like altimeters and barometers, which provide elevation and pressure data that can help anticipate weather changes. Some devices support two-way communication or emergency SOS functions, adding a layer of safety in remote areas. Nevertheless, the accuracy of GPS can be affected by satellite geometry, atmospheric conditions, and terrain obstruction. In such cases, using the device in conjunction with a map and compass ensures that you can continue navigating even when the GPS signal is unreliable. The key is to practice using all tools together, so that you can seamlessly switch between them as conditions dictate.
Navigating Unmarked or Unclear Trails
When trails are faint, overgrown, or completely unmarked, navigation becomes a more complex puzzle. In these situations, hikers must rely on terrain association, which involves matching map features to the physical landscape. For example, a mapped stream crossing or a distinct ridge line can serve as a handrail to follow. By continuously comparing the map to the surroundings, you can maintain a sense of direction and position. It is also helpful to look for clues such as cairns, blazes, or worn paths, though these may be absent in true wilderness areas.
Another technique for off-trail navigation is aiming off. Instead of heading directly to a small target like a stream crossing, you intentionally aim for a larger, more obvious feature nearby, such as a hilltop or a trail junction. Once you reach that feature, you can then navigate to the original target using a new bearing. This method reduces the risk of overshooting a small point due to compass error or unexpected obstacles. Similarly, deliberate offset involves walking a known distance and direction from your target to a catching feature, like a road or river, which acts as a backstop. If you hit the catching feature, you know you have gone too far and can adjust accordingly.
In dense fog, heavy rain, or nighttime conditions, visibility can drop dramatically, making navigation challenging. During such times, it is often wise to slow down, take frequent compass bearings, and use pacing to measure distance. Pacing involves counting steps to estimate distance traveled, which requires calibrating your pace count on known distances. Combining pacing with compass bearings allows for dead reckoning, a method of estimating your current position based on a known starting point, speed, and direction. While dead reckoning is not perfectly accurate, it can keep you on track until visibility improves or you reach a recognizable feature.
Planning and Preparation for Navigation
Effective navigation begins long before you set foot on the trail. Planning involves studying the route, identifying potential hazards, and establishing contingency plans. Start by researching the area using topographic maps, guidebooks, and online resources. Note key features such as water sources, campsites, and escape routes. Check weather forecasts and be prepared to alter plans if conditions deteriorate. Create a trip itinerary and leave it with a responsible person, including your expected return time and vehicle description. This information is invaluable for search and rescue teams in case of an emergency.
When packing, ensure you have the necessary navigation tools: a current map of the area, a reliable compass, and a GPS device or smartphone with offline maps. Carry a compass even if you have a GPS, as a backup. Include a pencil and paper for notes, a watch for timing, and a headlamp for visibility in low light. Consider bringing a personal locator beacon (PLB) or satellite messenger for emergency communication in areas without cell service. It is also wise to carry a small mirror and whistle for signaling. These items add little weight but can be crucial in unforeseen circumstances.
Finally, practice your navigation skills regularly, even on familiar trails. Set a goal to navigate using only a map and compass for a portion of each hike, or try to identify all the features you pass on the map. Over time, these exercises build muscle memory and confidence. Remember that navigation is a dynamic process that requires constant attention and adjustment. By honing your abilities and staying prepared, you can enjoy the outdoors with greater peace of mind, knowing that you have the tools and knowledge to find your way.